VisionGauge® 6-Point Nest Reorientation Tool
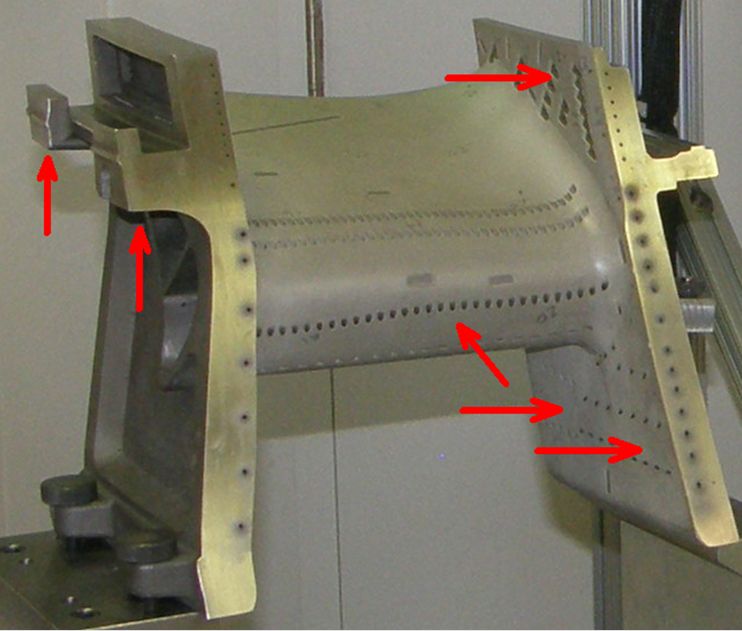
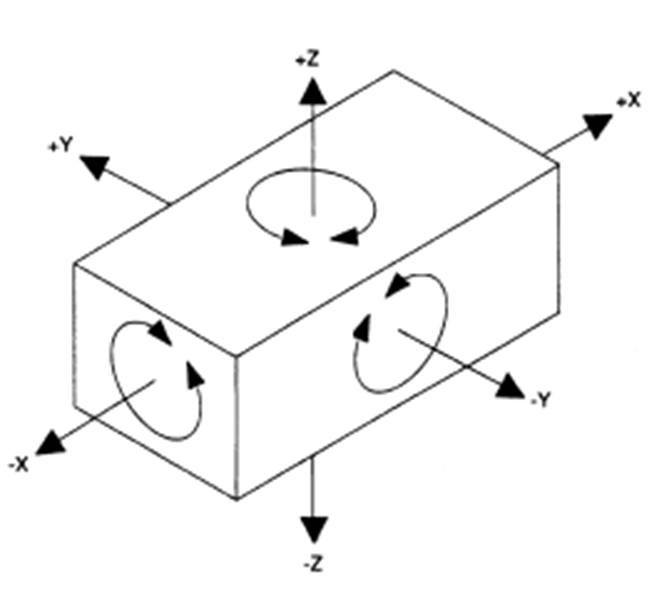
To be able to report the absolute location of a feature (such as cooling holes) on a part, a measurement system needs to know the location of the datums relative to which these locations are expressed. Five-axis parts use a six-point datum structure to set the position along the three Cartesian axes as well as the rotation about each of these three axes.
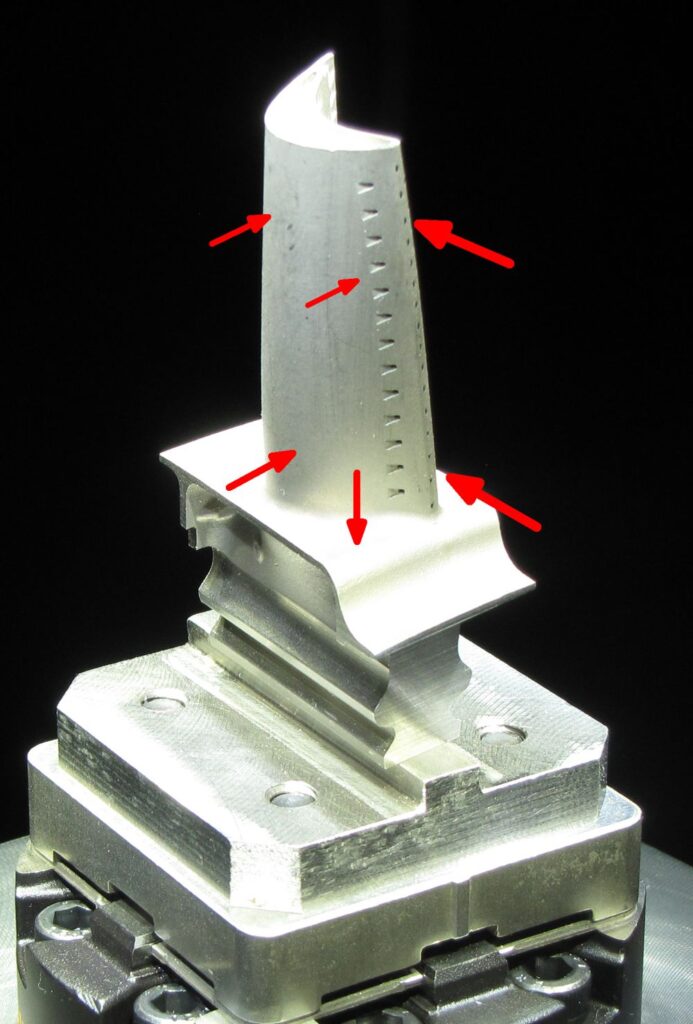
There are two different approaches to establish these datums. The first approach consists in using a fixture that physically comes into contact with the six datum points. And because the fixture is generally designed to easily line up with the un-rotated Cartesian axes (along the fixture's straight edges, for example or using locator holes, tooling balls or other appropriately designed simple features), it is quite simple to "zero out" the system's 5 axes of motion (i.e. X, Y, Z, A and B). As a result, with this first approach, the fixture physically sets the location of the datums in space.
With the second approach, a generally simpler fixture is used to only roughly position the part. With this approach, features on the fixture are still used to "zero out" the system's 5 axes of motion, but the resulting coordinate system is only approximate. For every part, the system still needs to accurately locate the datums and mathematically re-orient the part (in a way analogous to how a physical 6-point fixture physically reorients the part in space).
The VisionGauge® Digital Optical Comparator's "Part Reorientation" tool is a powerful and intuitive tool to carry out 6-point iterative alignment. It uses the VisionGauge® 700 Series' LASER module to accurately capture the part’s full 3D coordinates (i.e. X, Y and Z) at the datum points, even on parts with complex geometries. The tool converges quickly to a stable and accurate solution. And it is extremely simple to then apply the corrections to part inspection programs. The tool also allows you to set limits on the corrections (to ensure collision-avoidance, for example).
The VisionGauge® Digital Optical Comparator's 6-point iterative alignment tool accurately locates the 6 datum points on the part and mathematically "reorients" the part accordingly, along all of the part's 6 degrees of freedom.
A number of recent enhancements to VisionGauge®’s iterative 6-point nest part reorientation tool have increased its applicability and improved its performance, including:
- The ability to deal with non-line-of-sight datum points, i.e. points with normal (i.e. “gun barrel”) views that are obstructed. With this, the tool can be applied to virtually all applications!
- Significant performance enhancements in certain situations (for faster convergence)
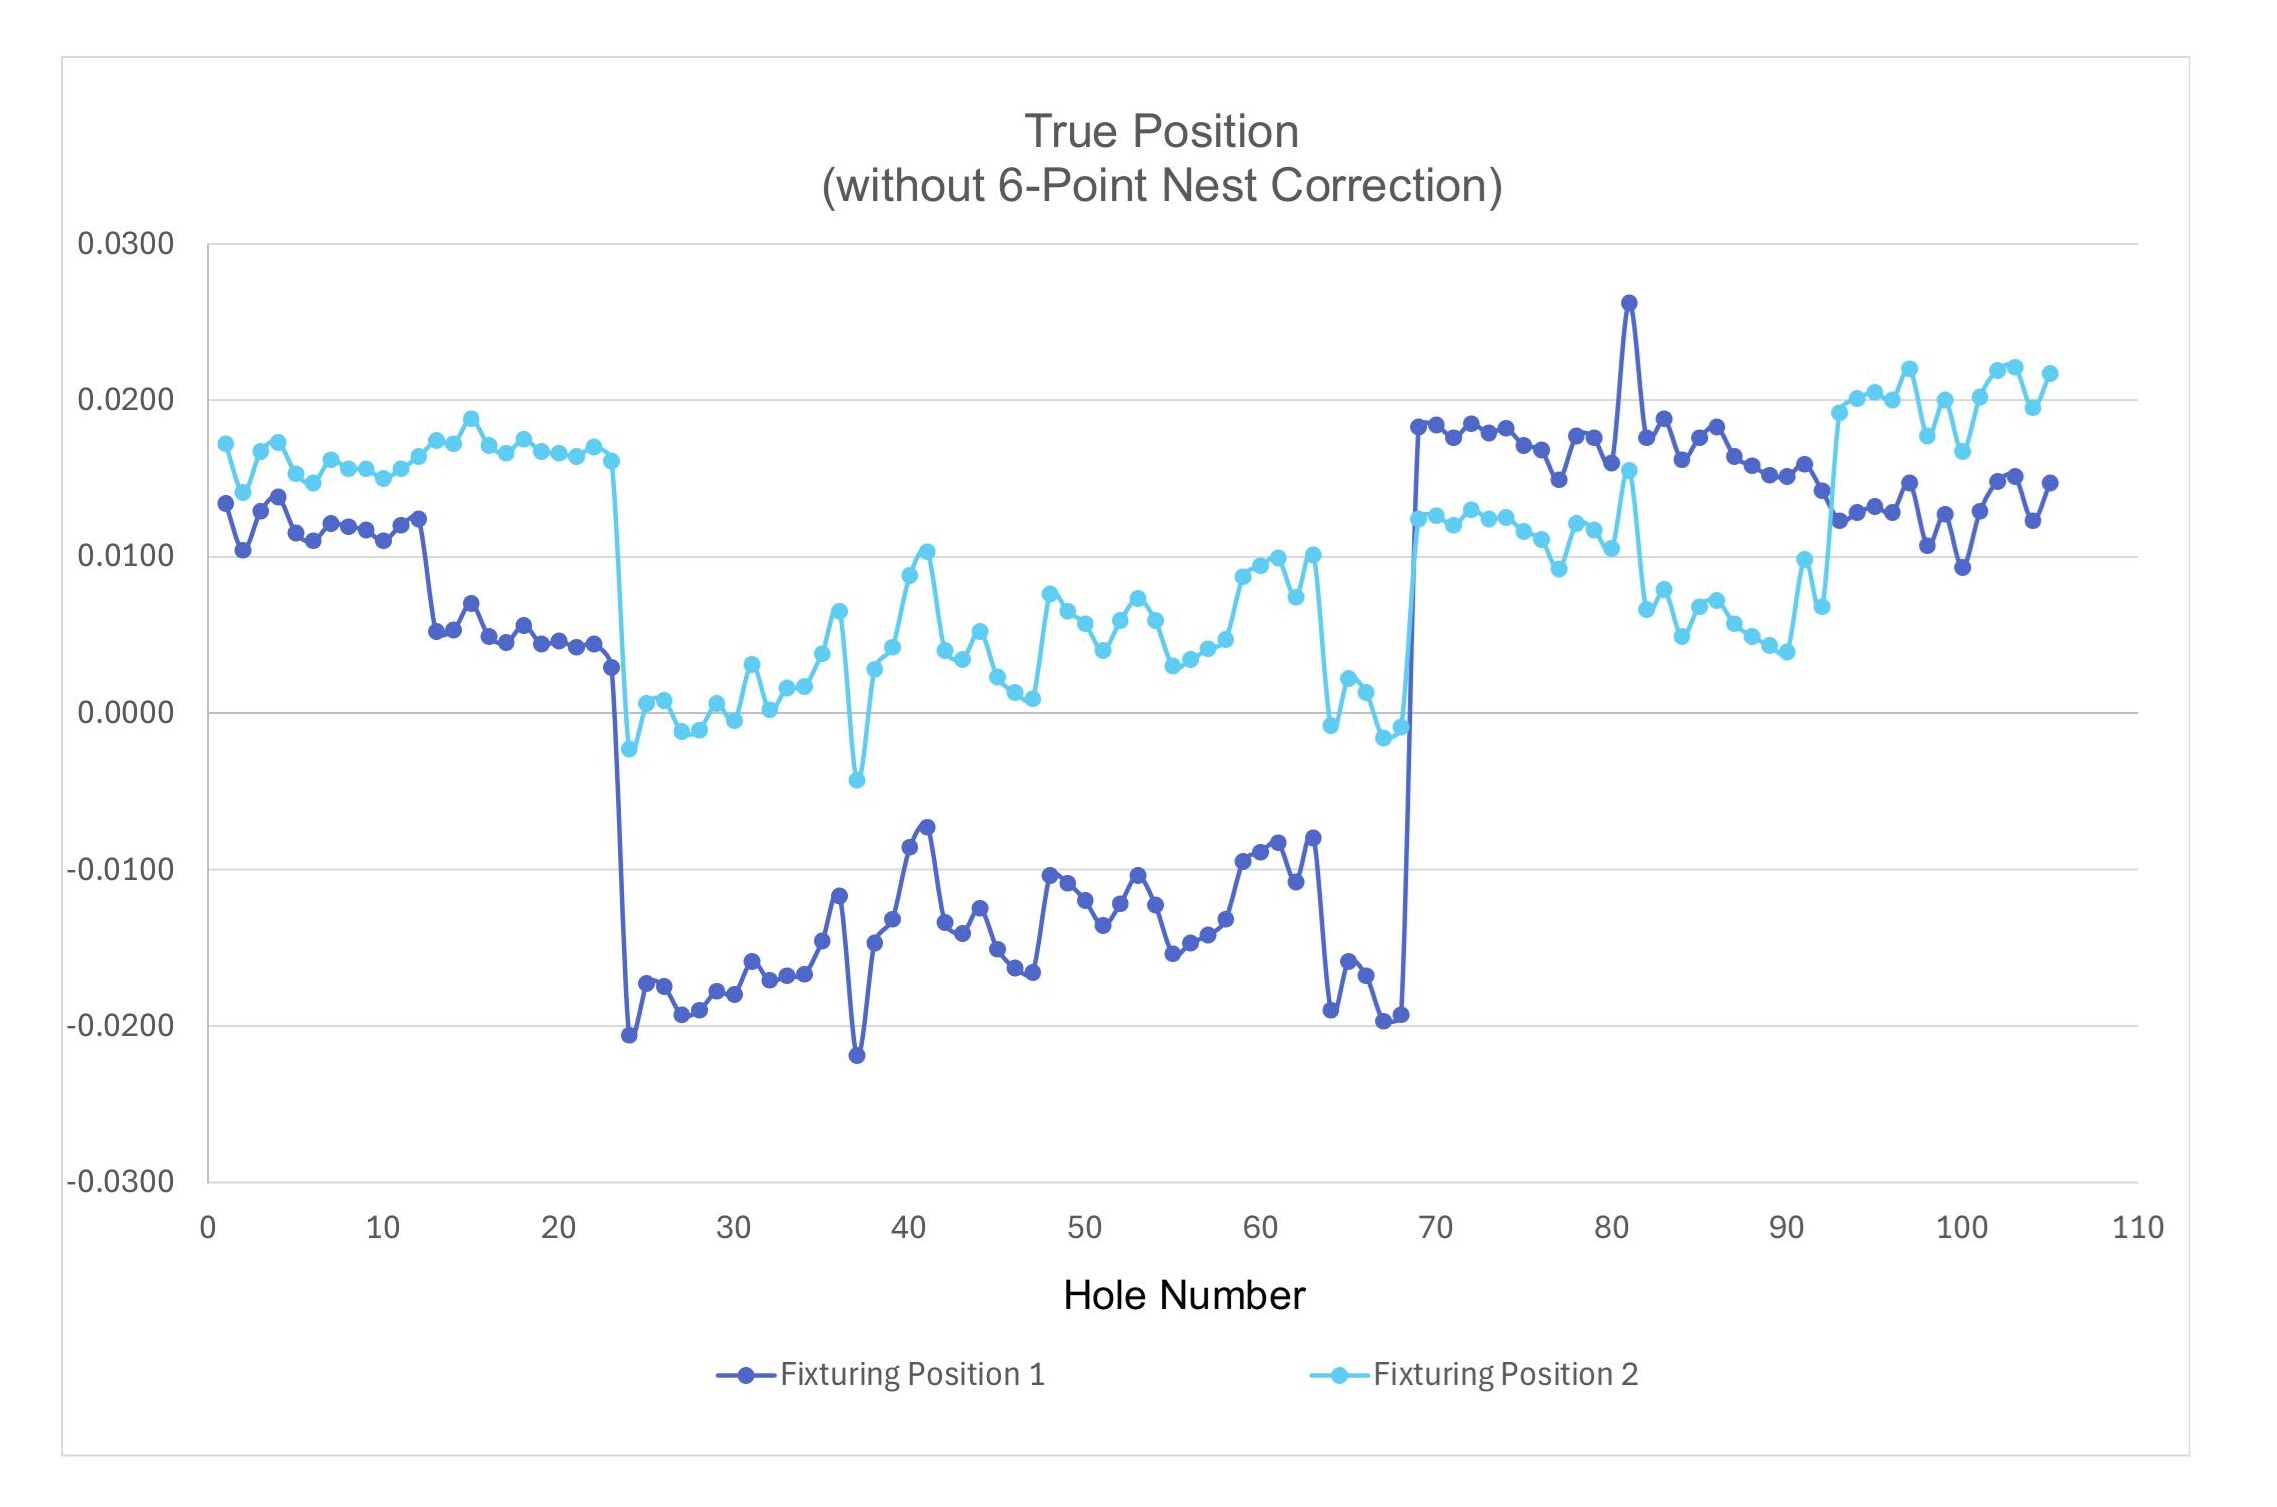
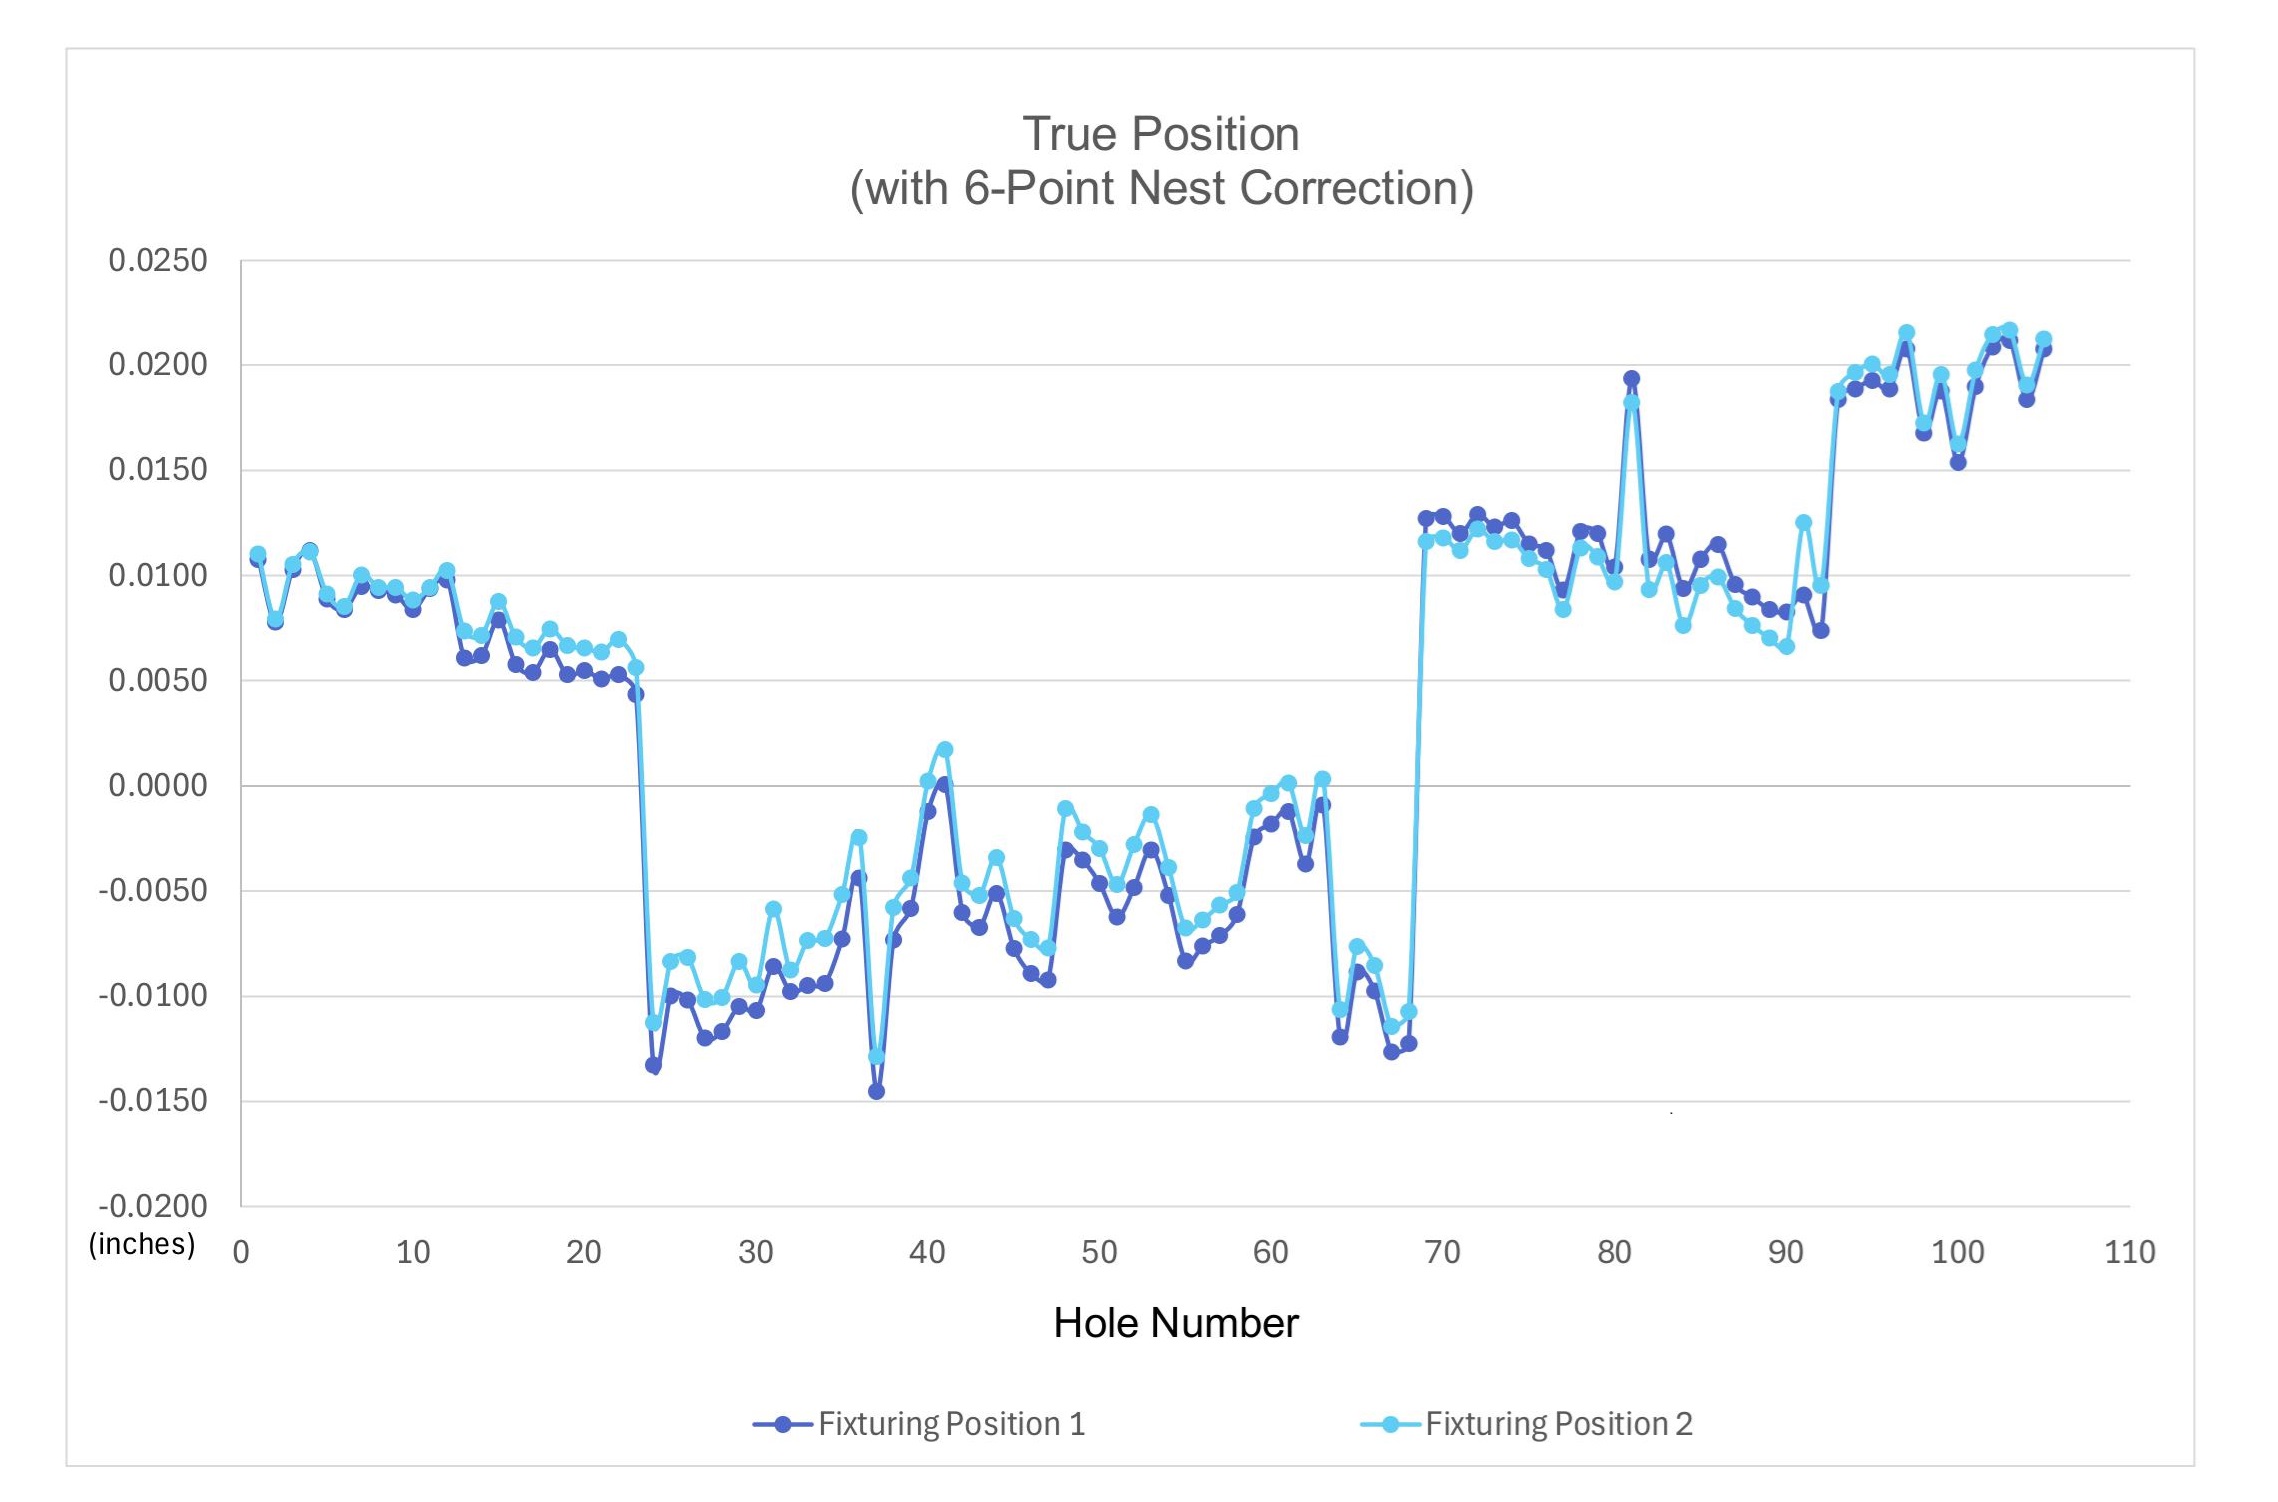
The graphs below show the effect of VisionGauge®’s iterative 6-point nest part reorientation tool on measurement results. In each graph, results are displayed for two different part fixturing positions. In the top graph, no 6-point reorientation is applied, and the results are very different (up to 0.020” i.e. 500µm) for the two different fixturing positions.
In the bottom graph, VisionGauge®’s 6-point nest reorientation tool is applied and the hole measurements are virtually the same, regardless of how the part is fixtured. VisionGauge® correctly “re-orients” the part, corrects for fixturing variation, and produces accurate results.
VisionGauge® 6-point nest reorientation tool produces accurate results, reliably corrects for part-to-part variation and reorients the part according to its 6-point nest. Subsequent hole & slot location & geometry measurements can then easily & reliably be carried out, very accurately.
Download this Application Note in .pdf format.
Contact us with your application requirements, and visit our Applications page for more examples of applications VisionGauge® Digital Optical Comparators can solve.
