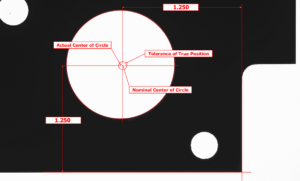
In this example, the hole’s nominal center point is defined precisely 1.250 inches vertically and horizontally from the corner of the part. The actual center of the hole is located, and the software automatically computes the True Position of the feature and reports a Pass/Fail result based on the diametric tolerance zone defined.
